

Why Rocky Ground Demands a Different Anchoring Strategy
When you pitch a tent on rocky terrain, standard steel pegs and a mallet are not enough. The ground does not yield, so the anchoring system must hold through mechanical grip, weighted ballast, or creative use of natural features. For commercial tent deployments on rock, gravel, scree, or compacted moraine, the real challenge is not the pole structure itself, but the ground interface. This guide covers the hardware, load paths, and field techniques that keep a tent standing when the ground fights back.
Why Standard Tent Pegs Fail on Rock
Most tents rely on driven pegs that create friction and shear resistance in soil. On rock, there is no soil to grip. A driven peg often bends, skids, or simply bounces off the surface. The result is a tent that shifts in wind, loses its taught shape, and can collapse under load. For commercial and expedition tents, this is not just an inconvenience; it is a safety and liability risk.
The key is to move from a friction-based system to a mechanical or weighted system. This means choosing the right hardware: rock spikes, expanding bolts, sandbags, or deadman anchors. The pole's foot must be secured to a solid point that cannot move laterally or vertically.
Hardware Options: From Rock Spikes to Expanding Bolts
Rock Spikes (Nail Pegs)
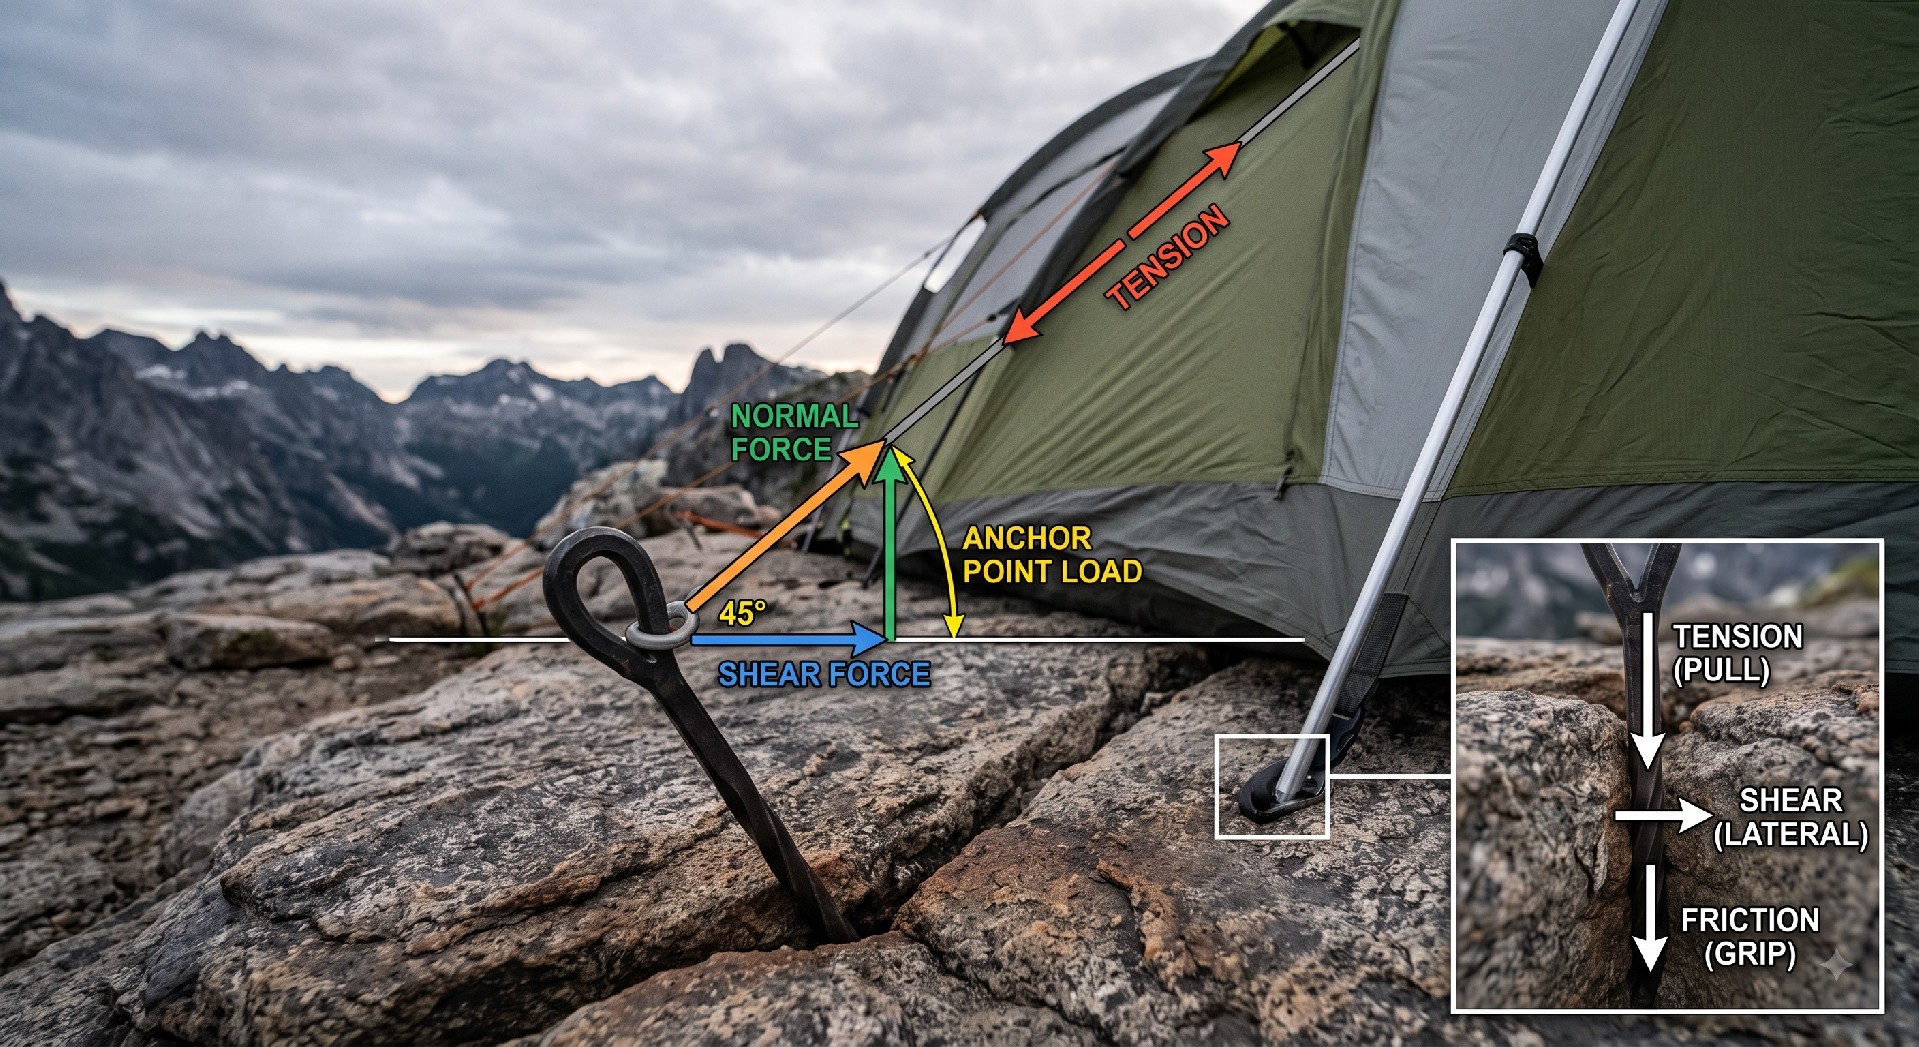
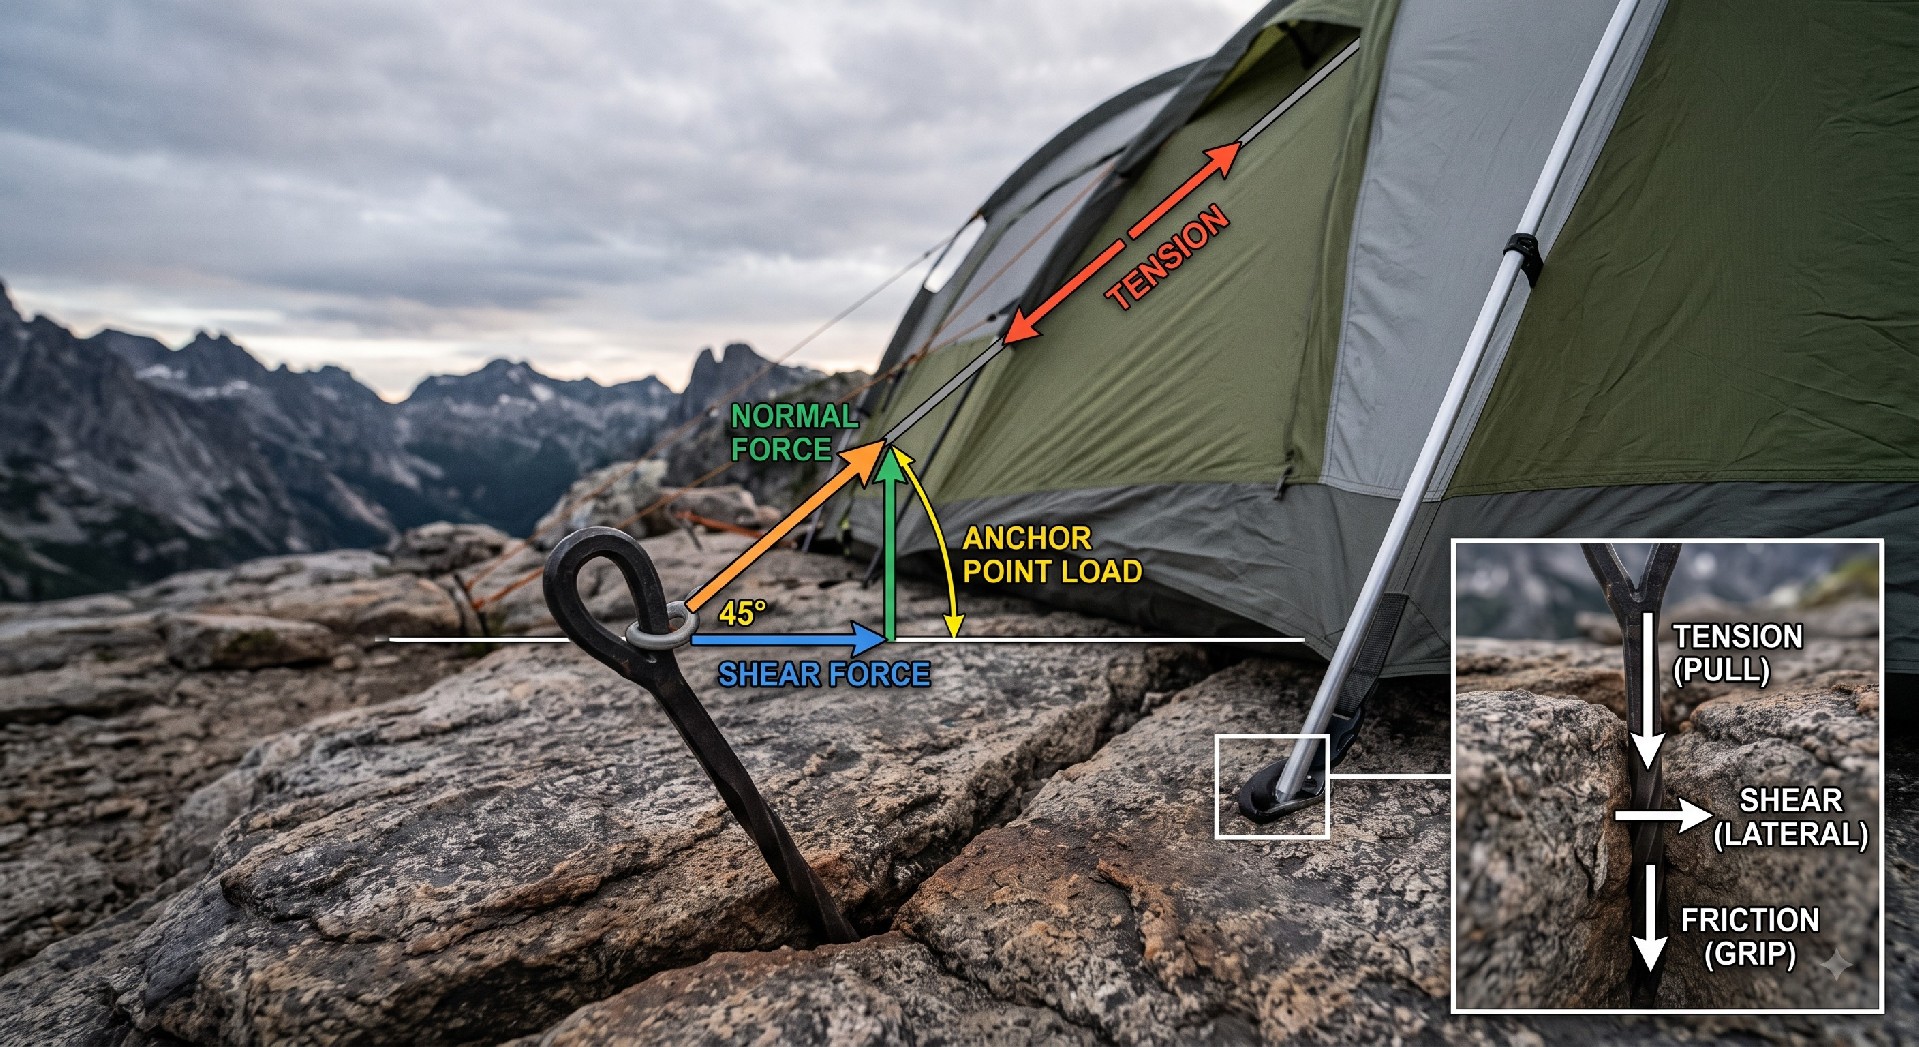
These are heavy-duty steel pegs with a flat, wide head designed to be driven into cracks or soft rock layers. They are not intended for solid granite but work well in shale, sandstone, or gravel. The key is to drive them at a 45-degree angle away from the tent. This creates a mechanical lock as the tension pulls the spike into the crack. Typical commercial ranges for length are 8 to 12 inches, with a diameter of at least 8mm.
Expanding Bolts (Drop-In Anchors)
For solid rock, expanding bolts or wedge anchors are the most secure option. These require a hammer drill and a specific bit size. A hole is drilled, the anchor is inserted, and as the bolt is tightened, a sleeve expands to lock the anchor in place. This is a permanent or semi-permanent solution, best for base camps or long-term installations. The load capacity is significant, often exceeding 1,000 lbs per anchor, but the setup time is high.
Sandbags and Weight Bags
When drilling is not possible or desired, sandbags are the go-to solution. Heavy-duty PVC or nylon bags filled with sand or rock can be attached to the pole feet. The weight provides hold-down force via gravity. A typical commercial sandbag for a large tent might weigh 40-60 lbs. This method is non-invasive but requires a large volume of material and does not resist uplift as effectively as a bolted anchor.
Deadman Anchors
This technique involves burying a large object (a rock, a log, or a specialized ground sheet) in a shallow trench. The tent guy line is attached to the object, which is then covered with a heavy pile of rocks or soil. This method is often used in expedition settings when the ground is mostly rock but has some debris or soil cover. It distributes the load over a large area.
| Anchoring Method | Best For | Setup Time (per anchor) | Reliability in Wind | Commercial Cost |
|---|---|---|---|---|
| Rock Spikes | Fractured rock, gravel, scree | 2-3 minutes | Medium | Low |
| Expanding Bolts | Solid bedrock | 10-15 minutes | High | Medium (Hardware) + High (Labor) |
| Sandbags (Pre-filled) | Any surface, non-destructive | 1 minute | Medium (Weight-dependent) | Medium (Material) + Low (Setup) |
| Deadman Anchors | Mixed ground with debris | 5-10 minutes | High (if buried deep) | Low (Natural material) + High (Labor) |
Field Assessment: What Surface Are You Really On?
The first step in any rocky terrain deployment is assessing the surface. Not all rock is the same.
Solid Bedrock (Granite, Basalt): Drilling is required. There is no other reliable method for high winds. Use expanding bolts and accept the permanent damage.
Fractured Rock (Sandstone, Shale, Limestone): Rock spikes or large sandbags can work. Look for cracks and fissures.
Gravel and Scree: This is actually easier. Large, heavy pegs can be driven, or a large rock can be used as a deadman anchor.
Boulder Fields: You cannot drive pegs, but you can tie off to large, immovable boulders. Use webbing or rope to create a secure anchor point.
Load Distribution and Guy Line Strategy
On rock, the tent poles themselves are under more stress because the ground does not absorb any movement. The load path from the pole hub to the ground must be straight and efficient. A common mistake is to place the anchor point too close to the pole base, which creates a steep angle and increases the force on the base.
The ideal angle for guy lines is 45 degrees from the ground. This balances vertical and horizontal forces. On rock, you may need to extend the reach of your guy lines to find a usable anchor point. Use extenders or extra cordage to reach a crack or a boulder. The pole's foot must also be prevented from sliding sideways. This is often achieved with a non-slip pad (rubber or silicone) placed under the foot, or by tying the foot to a rock spike.
Commercial Decision: Cost vs. Speed vs. Reliability
The choice of anchoring technique has direct commercial implications.
For a rental fleet: Speed is critical. Sandbags and pre-filled weight bags are the fastest setup. However, they are heavy to transport. Rock spikes are a good compromise, offering speed and moderate reliability.
For a permanent installation: Expanding bolts are the only choice. The higher initial cost and setup time are offset by lower wind damage and fewer call-outs.
For an expedition team: Weight is the primary concern. Deadman anchors and rock spikes are chosen for their weight-to-security ratio.
There is also a maintenance decision. Expanding bolts should be inspected annually for rust and corrosion. Rock spikes will bend over time and need replacement. Sandbags can develop leaks and must be patched or replaced.
Conclusion: The Right Tool for the Rock
Anchoring on rocky terrain is not a one-size-fits-all scenario. The best tent pole placement technique is to first understand the ground, then select the appropriate hardware. For solid rock, use expanding bolts. For cracked rock, use rock spikes. For boulder fields, use natural anchors. And for all scenarios, the load path must be straight and the guy line angle must be correct. The commercial decision comes down to balancing the cost of hardware and setup time against the risk of wind damage and equipment failure.
Always carry a backup set of hardware. On rocky ground, the primary system may fail, and a secondary system (like a rock bag) can save the tent. This is not about being an expert rock climber; it is about being a prepared and professional equipment operator.