

Why Seam Leaks Happen on Waterproof Outdoor Tents
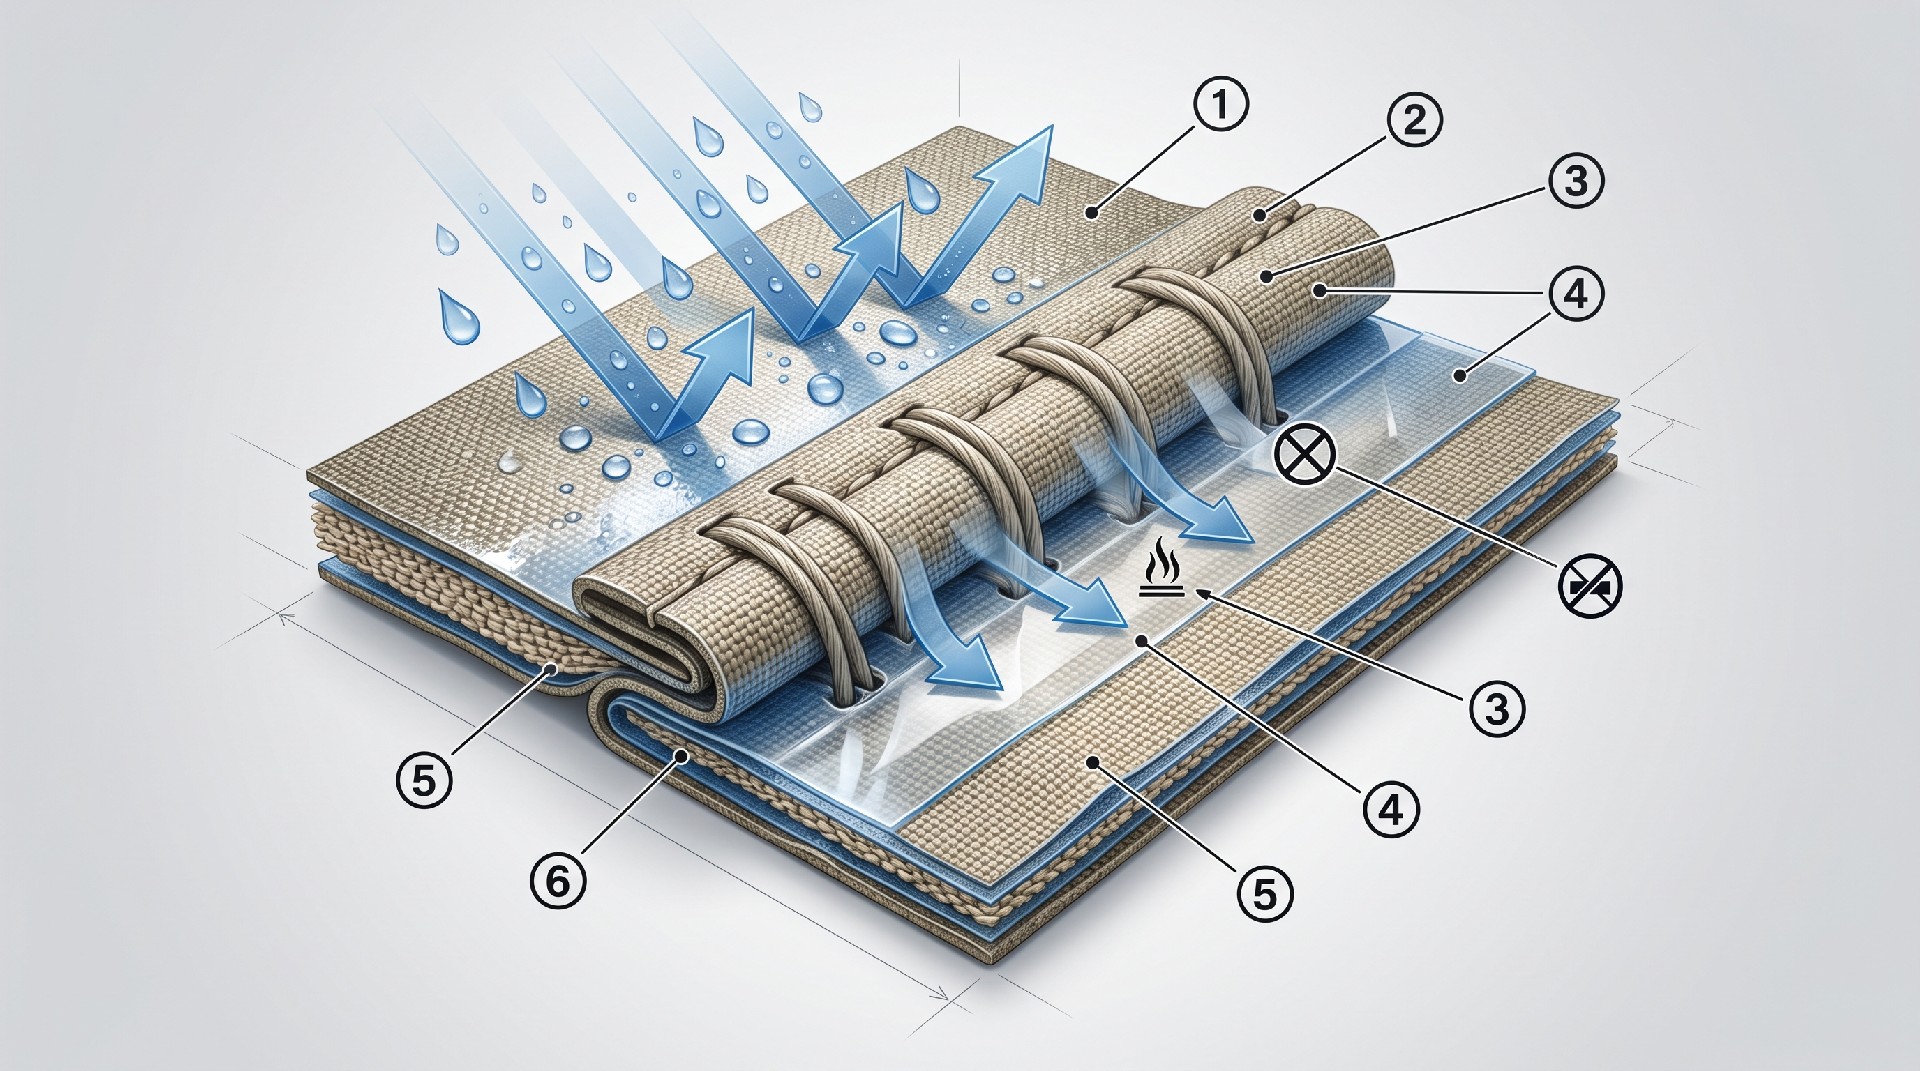
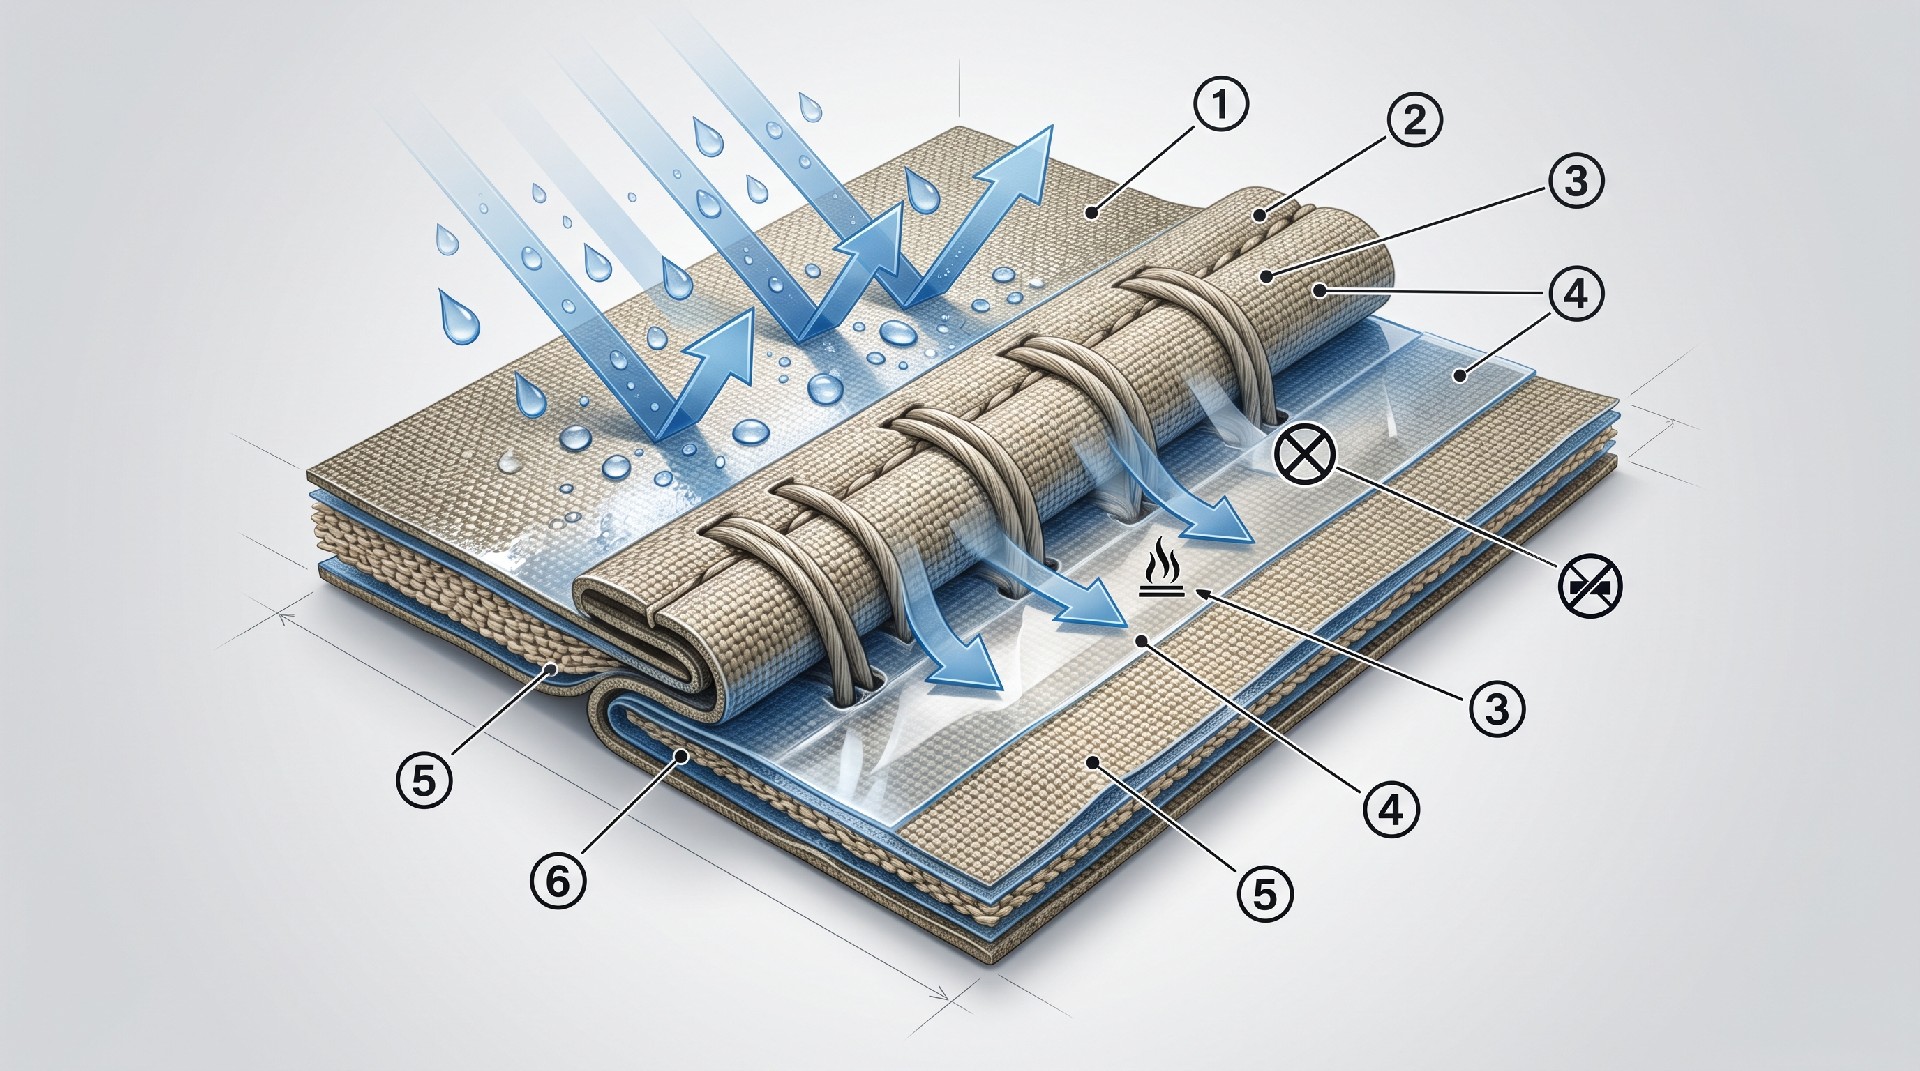
A leaking seam on a waterproof outdoor tent is rarely a random defect. In commercial-grade tents, water almost always enters through one of three paths: stitch perforations in the base fabric, a failed seam-sealing tape bond, or abrasion damage where a seam crosses a stress point. Understanding which path is active determines whether you can repair the seam in the field or whether the panel needs replacement.
The most common failure pattern in waterproof outdoor tents used for commercial rental, glamping, or event deployment is tape delamination. The seam tape is a heat-activated adhesive film bonded over the stitched seam. Under repeated folding, UV exposure, and thermal cycling, the adhesive plasticizer migrates and the bond weakens. Once the tape lifts at the edge, capillary action pulls water along the stitch line within hours of rain contact.
A second pattern appears in tents with coated polyester or nylon flysheets: the coating itself cracks along the seam ridge where the fabric is folded and stitched. This is a material fatigue issue, not an adhesive issue, and it changes the repair method entirely.
Diagnosing the Leak Before You Seal
Field diagnosis should follow a fixed sequence. Skipping steps leads to sealing the wrong layer and a repeat leak after the next rain event.
Step 1: Confirm the water path
Dry the tent completely. Seam sealants will not bond to damp fabric or contaminated tape.
Spray the interior seam line with a dilute soap solution and apply low-pressure air from outside. Bubbles mark the exact breach.
If no bubbles appear, the leak may be condensation, not seam failure. Check ventilation and dew-point conditions before assuming a seam defect.
Step 2: Identify the seam construction
Flat-felled seam: fabric edges folded and stitched, common on flysheets and lightweight tents.
Lapped seam: two panels overlapped and stitched, typical on heavier waterproof outdoor tents.
Welded or heat-sealed seam: no stitching, common on TPU and PVC air-beam tents. These require different repair materials.
Step 3: Assess tape condition
If the existing seam tape is lifting, cracked, or gummy, do not seal over it. Remove the failed tape with a controlled heat source and plastic scraper, then clean the seam with isopropyl alcohol. Sealing over failed tape traps the original leak and creates a false repair.
Field Repair Methods Compared
The correct repair depends on seam type, fabric coating, and whether the tent is in service or in storage. The table below compares the three practical field methods for waterproof outdoor tent seams.
| Repair Method | Best-Fit Seam Type | Typical Cure / Set Time | Field Limitation |
|---|---|---|---|
| Liquid seam sealant (PU or silicone) | Stitched flat-felled and lapped seams on coated fabric | 12–24 hours for PU; longer for silicone, supplier-dependent | Requires dry conditions and full cure before rain exposure |
| Heat-activated seam tape | Stitched seams on PU, PVC, and some TPU coatings | Immediate bond after cooling; full adhesion often 24 hours | Needs controlled heat and pressure; difficult on irregular seams |
| Hot-air welding with TPU or PVC rod | Welded or heat-sealed seams on air-beam and PVC tents | Immediate handling after cooling | Requires welding equipment and operator skill; not for coated nylon |
| Two-part PU adhesive patch | Localized seam breaches and abrasion points | Often 24–48 hours at room temperature | Bulkier repair; may affect packed volume and flexibility |
Seam Sealant Selection by Fabric and Coating
Not every sealant bonds to every coating. The two most common failure modes in field repairs are applying a silicone-based sealant to a PU-coated fabric and applying a PU sealant to a silicone-coated fabric. Both produce a weak bond that peels within weeks.
Polyurethane and PU-coated fabrics
Use a PU-compatible seam sealant or heat-activated tape. These are commonly specified for commercial waterproof outdoor tents with PU or PVC coatings. Working temperature range and cure time are supplier-dependent; verify against the final datasheet before field use.
Silicone-coated and silnylon fabrics
Use a silicone-based sealant. These are often targeted by OEM buyers for lightweight glamping and expedition tents. Cure time is typically longer, and the seam must be held under light tension during cure to prevent wicking.
TPU and PVC air-beam tents
Use a TPU or PVC welding rod and a hot-air welder, or a two-part PU adhesive designed for the specific coating. Solvent-based sealants are generally unsuitable because they can attack the coating and reduce seam strength.
Step-by-Step Seam Sealing Procedure
Preparation
Set up the tent under cover or in dry conditions with relative humidity below 70% where possible.
Clean the seam with isopropyl alcohol and allow it to flash off completely.
Lightly abrade glossy coatings with a fine abrasive pad to improve mechanical key.
Mask both sides of the seam with painter's tape to control sealant width.
Application
Apply sealant in a thin, continuous bead along the stitch line, working in 300–500 mm sections.
Work the sealant into the stitch perforations with a small brush or gloved fingertip.
For tape repairs, apply heat at the supplier-recommended temperature and pressure, typically with a hand roller.
Remove masking tape while the sealant is still wet to avoid lifting the cured edge.
Cure and verification
Allow full cure per the sealant datasheet, often 12–24 hours for PU sealants and longer for silicone.
Re-test with the soap-bubble method before returning the tent to service.
Record the repair location and date for lifecycle tracking.
Repair vs. Replace: The Commercial Decision
For a single seam leak on a tent that is otherwise structurally sound, field repair is almost always the correct choice. The exception is when the leak appears along a load-bearing seam near an anchor point, corner, or air-beam junction. In those locations, seam failure is a symptom of structural overload, and a surface seal will not restore the original strength.
Retire or replace the panel when:
Seam tape has failed along more than 30% of its length.
Stitch holes have elongated and the fabric around them has distorted.
The coating has cracked through to the base fabric along the seam ridge.
The tent has exceeded its planned service interval and multiple seams are failing simultaneously.
For rental fleet operators, the practical rule is to repair seams that fail in isolation and replace panels that fail in clusters. Tracking seam repair frequency by tent ID turns a reactive maintenance cost into a predictable replacement schedule.
Buyer checklist before sealing
Confirm fabric and coating type from the supplier datasheet.
Match sealant chemistry to coating chemistry.
Verify cure time and temperature range for the intended service environment.
Check whether the repair affects any fire-retardancy or compliance certification.
Record the repair for warranty and lifecycle tracking.
Seam sealing is a specification decision as much as a repair task. The right sealant, applied to a correctly prepared seam, extends service life by years. The wrong sealant, applied over failed tape, guarantees a repeat leak and a dissatisfied end user.