

The High Cost of a Slow Leak in Your Fleet
For a rental fleet operator or resort manager, a kayak or paddleboard that is soft after an hour on the water is more than an inconvenience. It represents lost revenue, a disappointed customer, and unnecessary staff time spent on a problem that is often preventable. The phrase "How to Fix a Leaky Valve Stem on an Inflatable Kayak or Poo" usually originates from a single, frustrating symptom: you inflate a board or kayak to its recommended working pressure, and within a short period, it loses rigidity. The core of this problem often lies not in a puncture, but in the valve stem itself. This is the critical interface between the high-pressure air inside the drop-stitch chamber and the outside environment. A leaking valve stem is a common, yet easily addressable, lifecycle cost for commercial operators. This guide focuses on the specific engineering, diagnostics, and maintenance decisions required to resolve this issue efficiently, minimizing downtime and maximizing the service life of your fleet.
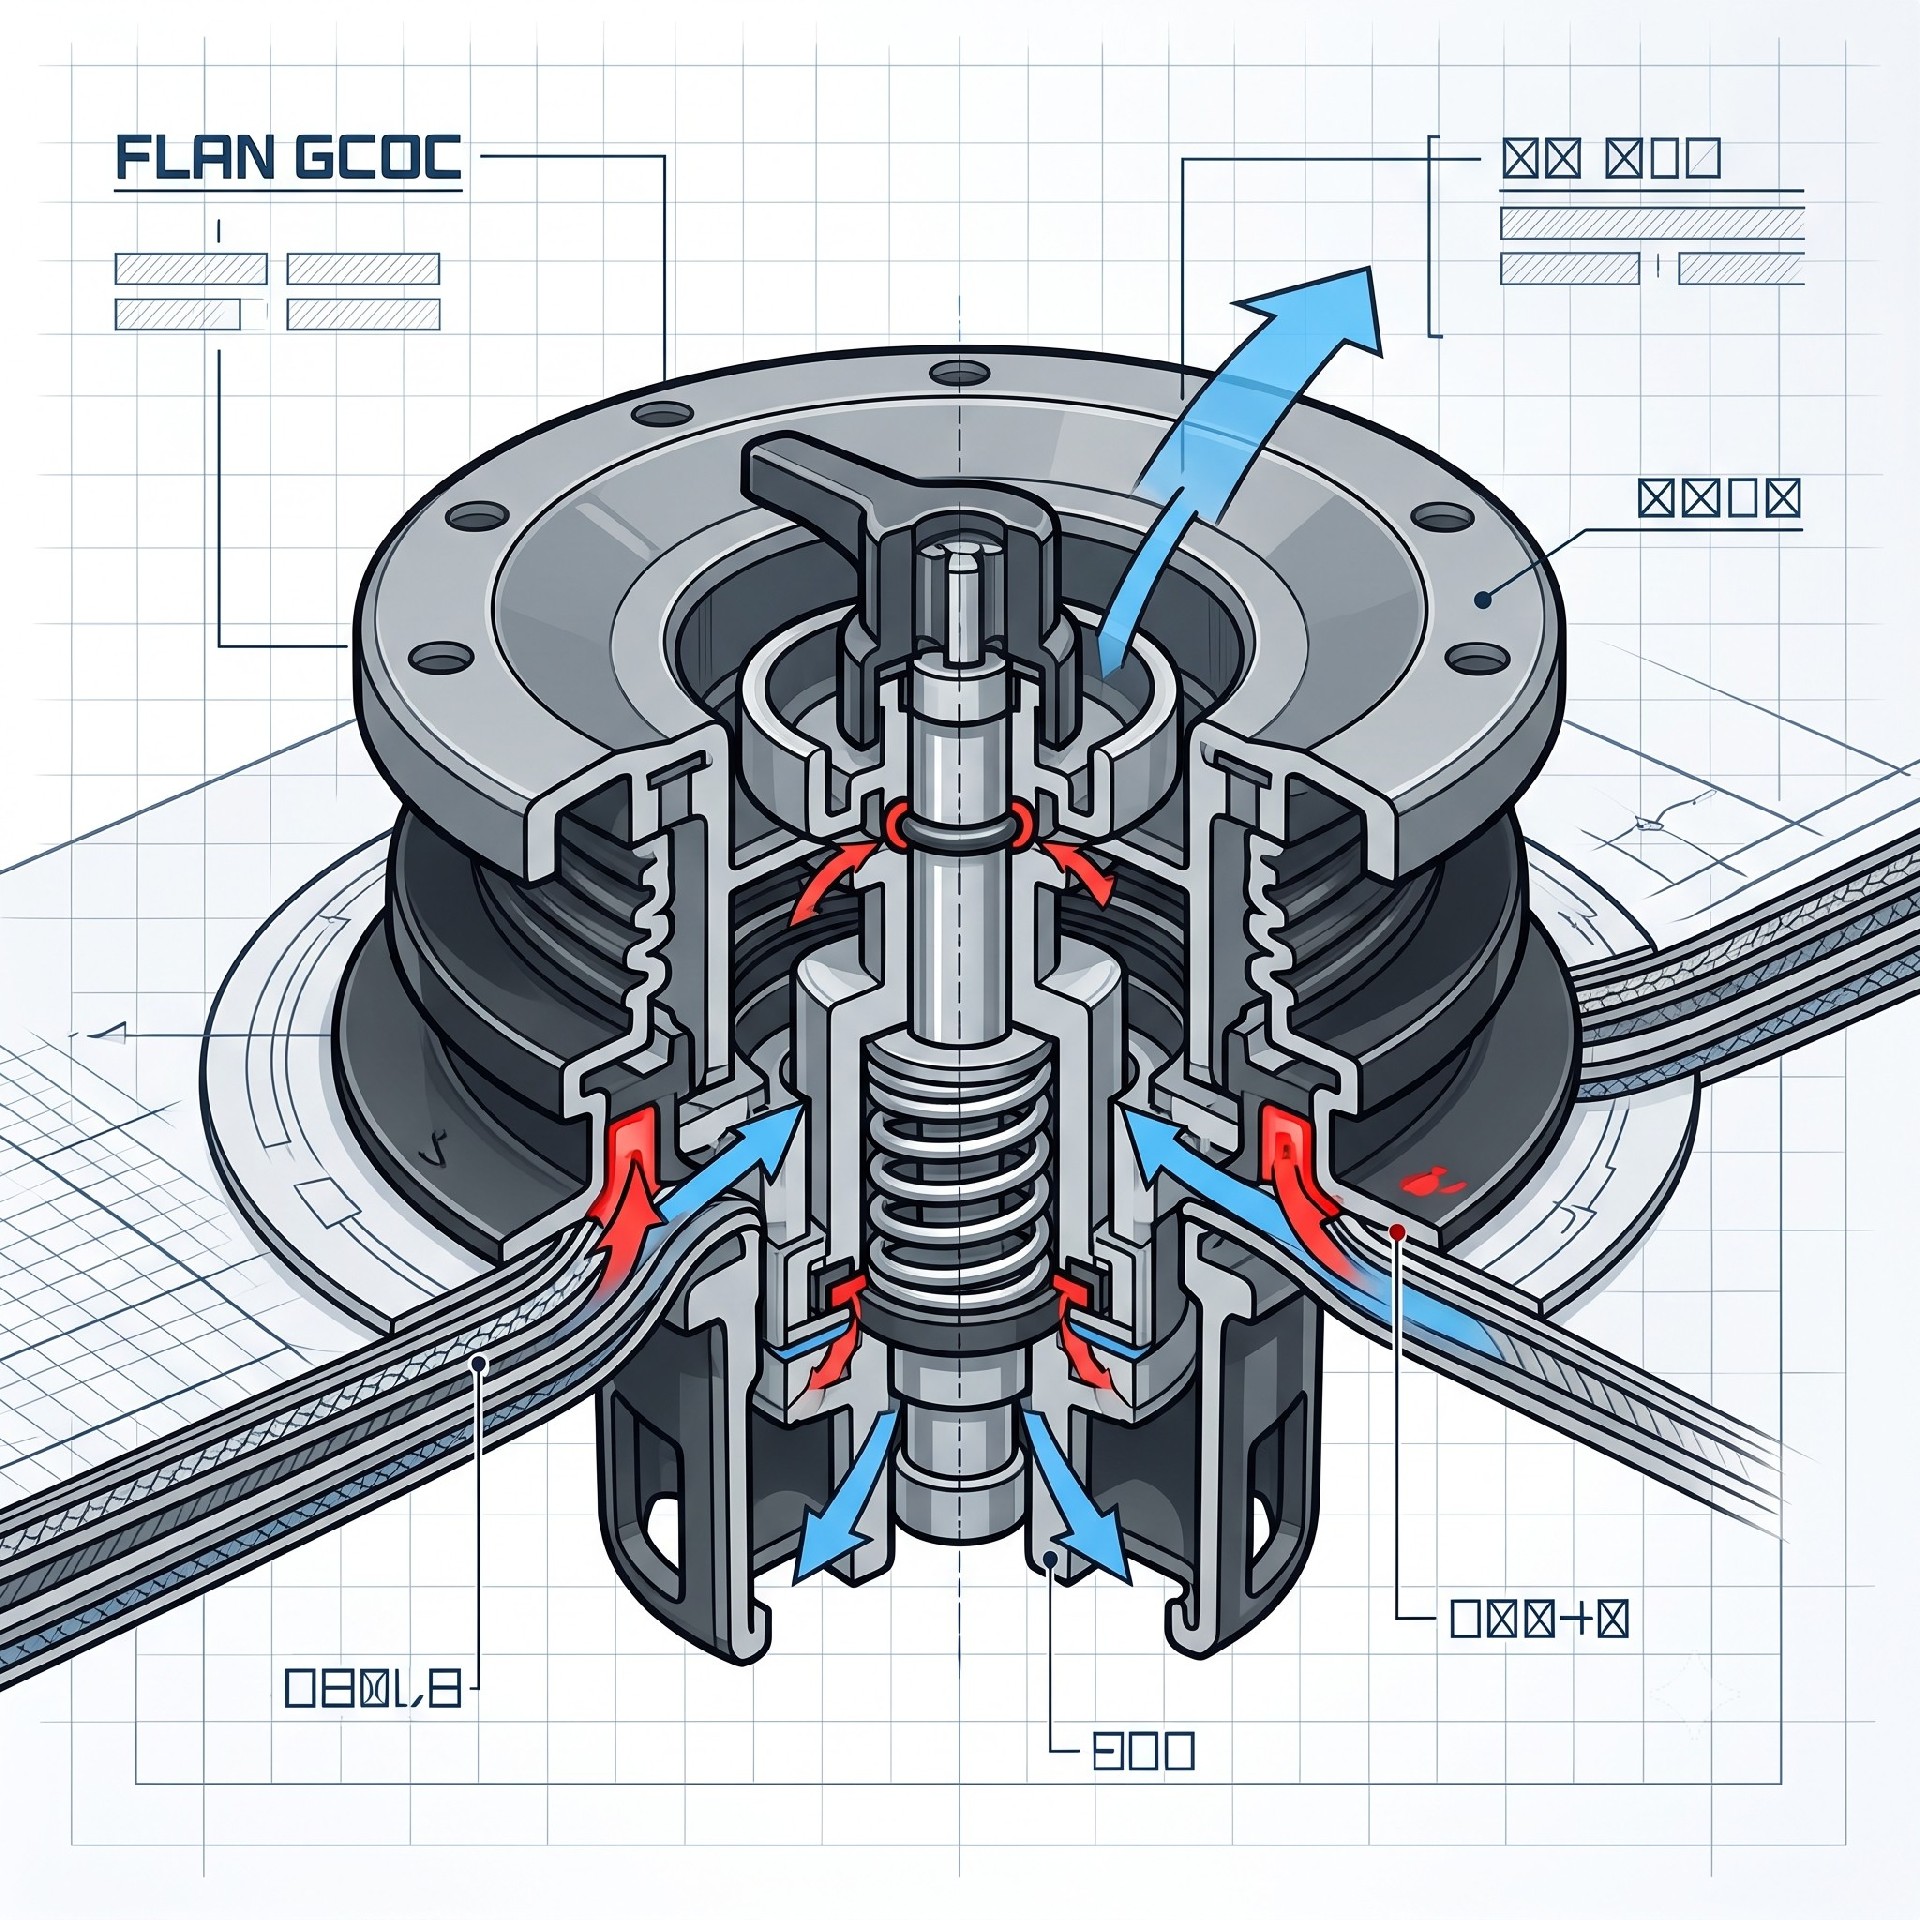
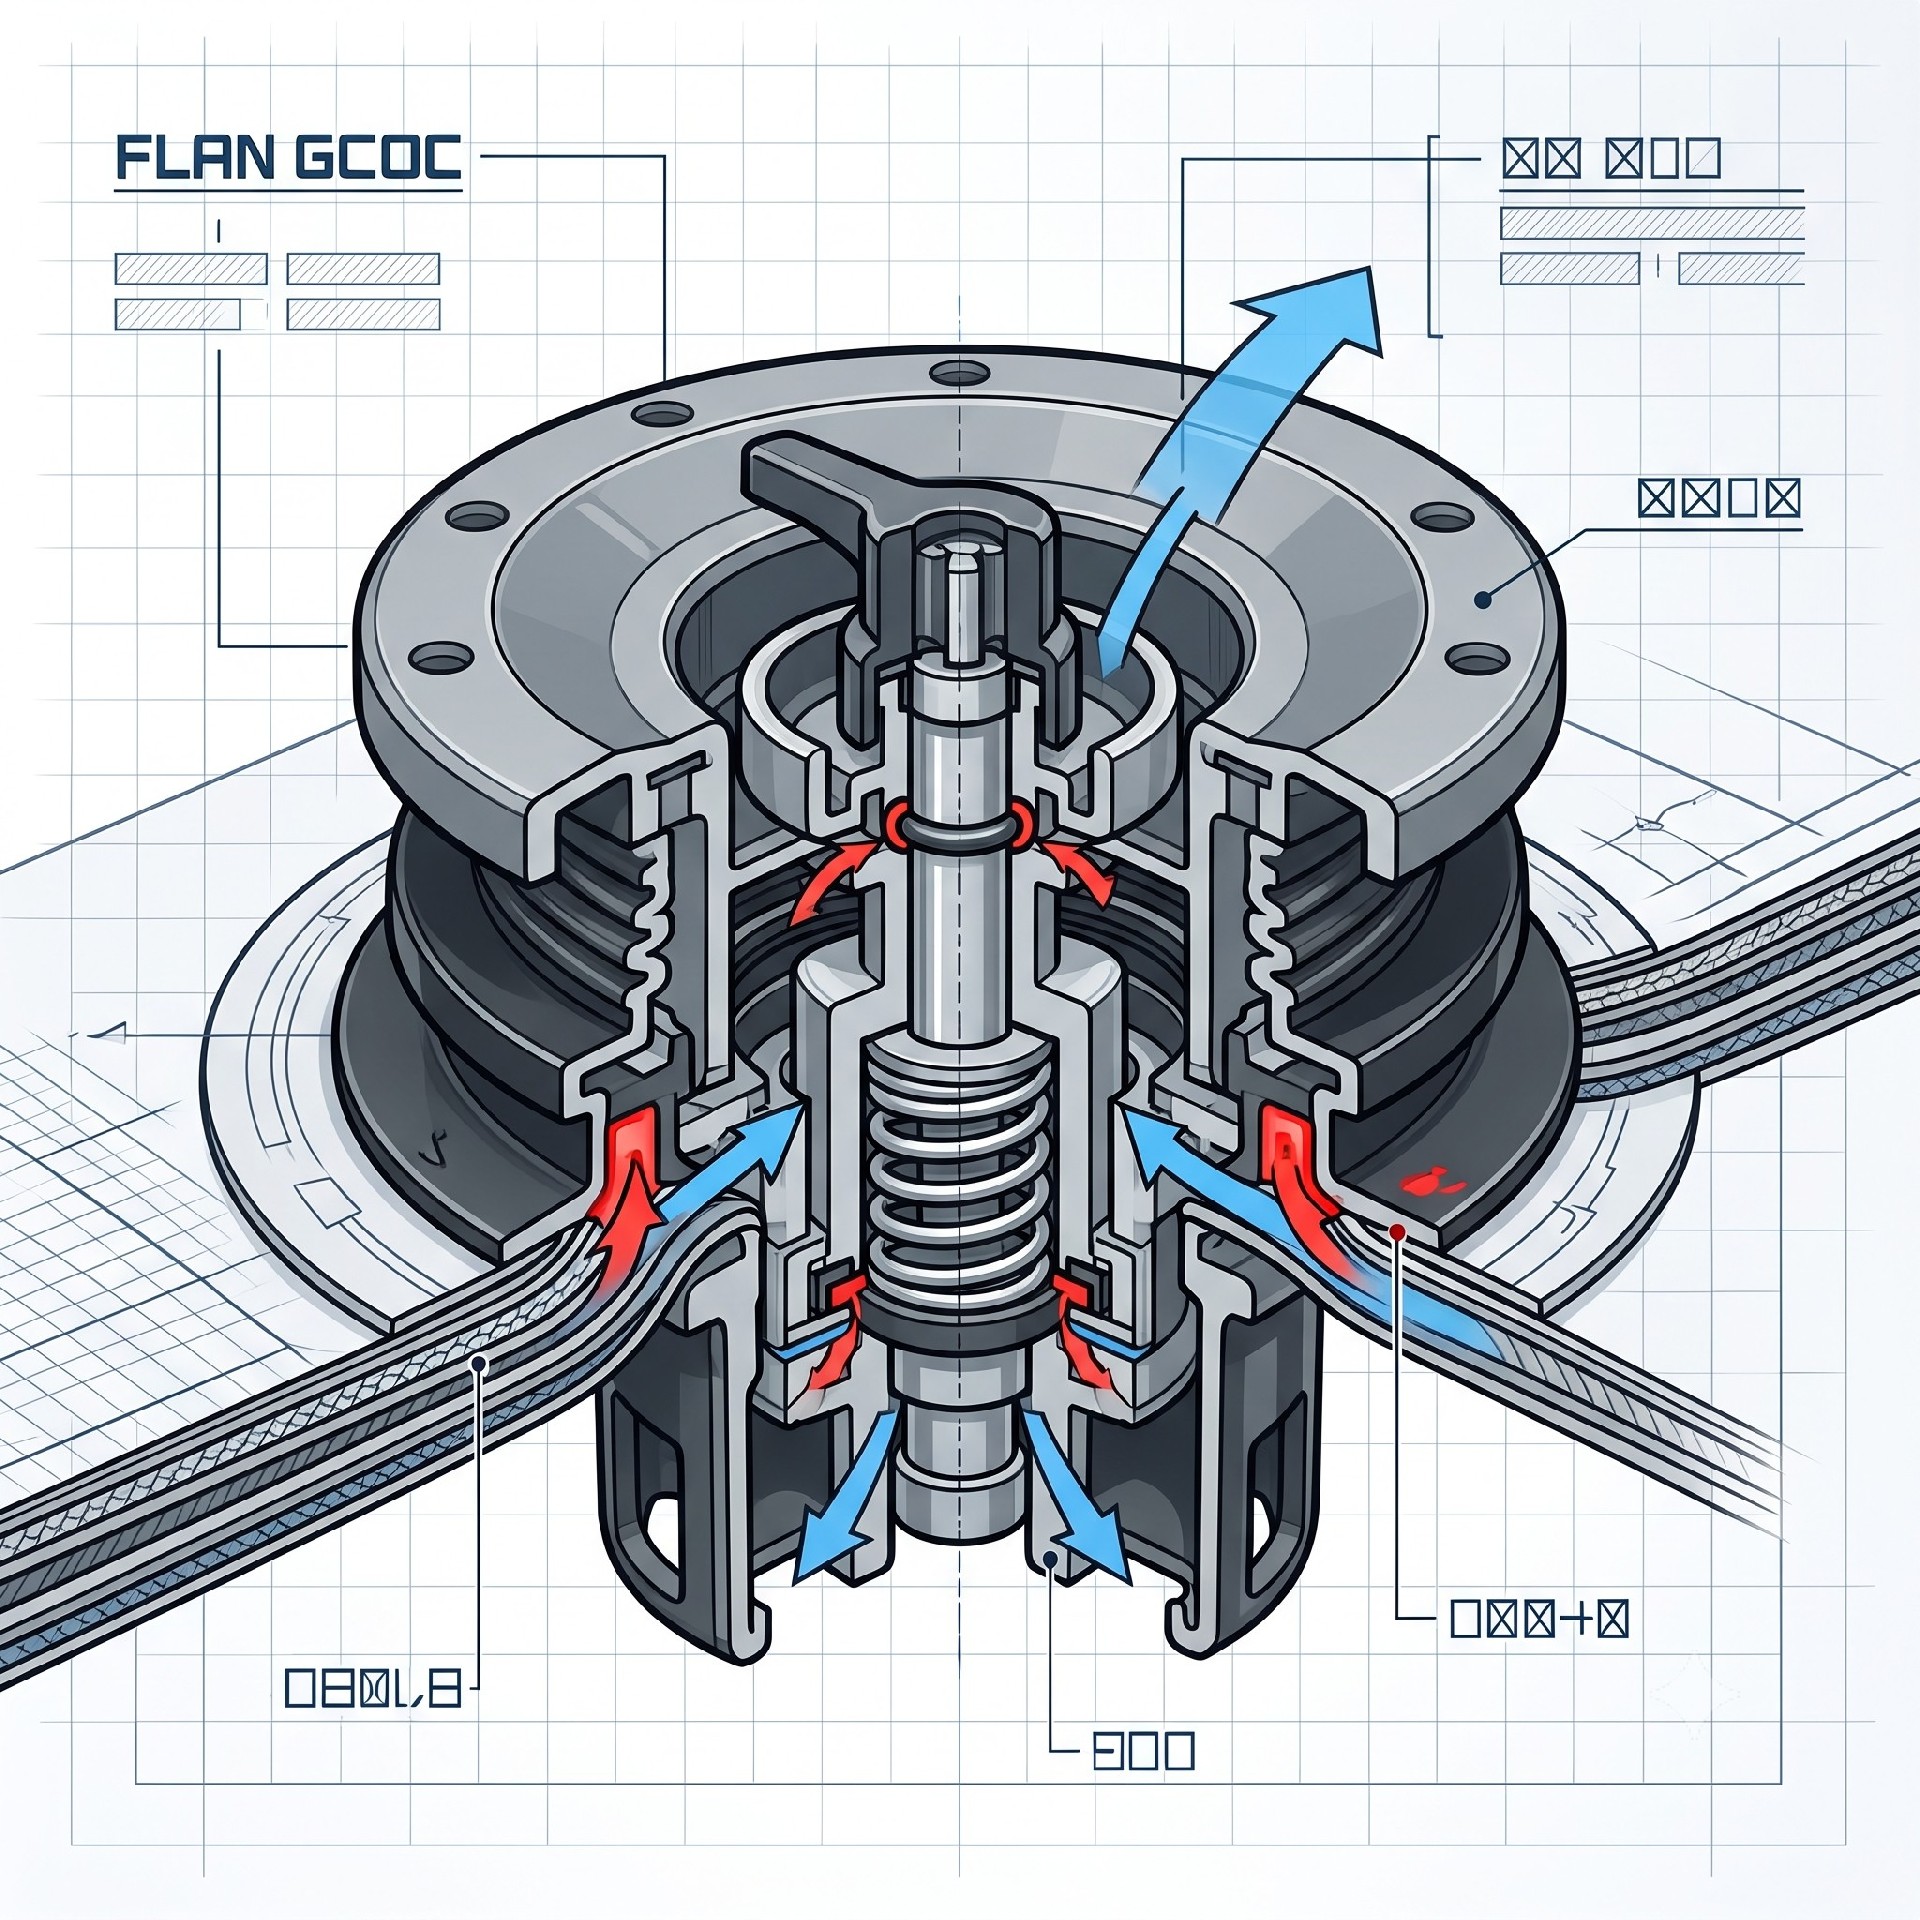
Anatomy of a Valve Stem: Understanding the Failure Points
Before reaching for a repair kit, it is crucial to understand why a valve stem fails. Most modern inflatable kayaks and paddleboards use a Halkey-Roberts style or a military-style valve. These are designed to be one-way, high-pressure valves that hold air when the plunger is depressed. A leak at the stem itself rarely involves the external cap. Instead, it typically originates from one of three specific points:
The O-Ring Seal: The primary seal is a small rubber O-ring located on the valve plunger or the base. Over time, exposure to UV light, saltwater, or sand can degrade this O-ring, causing it to harden or crack. This allows air to escape past the plunger even when closed.
The Valve Core: Similar to a car tire, the valve core contains a spring-loaded pin and a rubber seal. A weak spring or a damaged seal on the core itself is a frequent source of slow leaks. A dirty core with trapped debris can also prevent a complete seal.
The Base Seal (Leak Between Valve and Kayak/Pool Material): This is the most critical failure point for a commercial fleet. The valve stem body is welded or glued into the PVC or TPU material of the kayak or pool. If this bond is compromised due to material fatigue, an impact, or a manufacturing defect, the air will escape between the outside of the valve stem and the fabric. This is identifiable by bubbling around the base of the valve when underwater.
Correctly identifying which of these three failure modes is present is the first step in selecting the right repair strategy. A simple O-ring replacement is a 60-second fix, whereas a base seal repair requires a full patch and may take the unit out of service for 24 hours.
Diagnostic Workflow: From Symptom to Root Cause
Your operational goal is to restore pressure retention as quickly as possible. A systematic diagnostic sequence is essential for any maintenance engineer or rental operator. Follow this procedure for any kayak or pool reporting pressure loss:
Soapy Water Test (The Standard): Inflate the kayak, pool, or paddleboard to its typical commercial range (usually 10-15 PSI for leisure craft, though always verify against the final datasheet). Spray a solution of dish soap and water around the valve stem and all seams. If you see bubbles forming, you have found the leak. This test is simple but the most reliable diagnostic check available.
Check the Valve Core: Use a valve core tool to remove the core from the stem. Inspect the small rubber seal at the base of the core for any cracks or foreign material. If it looks compromised, replace it with a new core.
Check the O-Ring: With the core removed, check the O-ring on the plunger. Lubricate it with a silicone-based grease specifically designed for inflatable equipment. Using petroleum-based products can degrade the rubber and cause a failure.
Isolate the Base: If bubbles appear at the base of the stem where it meets the fabric, the weld has failed. This is the most involved repair. Note that a commercial-grade kayak typically features a reinforced valve base patch to resist the stress of high pressure; if this patch is peeling, it's a warning sign of a larger material fatigue issue.
| Failure Point | Diagnostic Check | Corrective Action | Commercial Decision |
|---|---|---|---|
| Valve Core Seal | Bubbles escaping from center of valve; core loose or dirty. | Replace valve core with a new one; use a core tool to tighten. | Classify as minor maintenance. Keep cores in stock for immediate 5-min fix. |
| Plunger O-Ring | Bubbles escaping around the plunger under the cap. | Inspect O-ring for cracks. Lubricate with silicone grease or replace. | Preventative maintenance. Lubricate during weekly inspection to extend life. |
| Base Seal (Leak at Fabric) | Bubbles forming at the base of the stem where it meets the kayak or pool material. | Deflate, clean, sand, apply PVC adhesive, clamp, and allow 24 hours to cure. | Major repair. Requires 24hr downtime. Replace unit if base seal failure recurs. |
| Stem Body (Cracked) | Bubbles emerging from a crack in the plastic housing of the stem. | Replace the entire valve assembly (requires removing the old stem and welding/gluing a new one). | Consider unit age. If older, this is often a retirement trigger for a commercial fleet. |
Repair Execution: Field and Shop Options
Once you have identified the failure mode, you must decide between a field fix and a shop repair. This decision often dictates the cost and effectiveness of the repair.
Core and O-Ring Replacement (The Quick Win)
For the valve core and O-ring, the repair is straightforward. Always keep a stock of standard valve cores and O-rings in your maintenance kit. These are low-cost items that solve the majority of "leaky stem" complaints. The commercial decision here is to classify this as a minor maintenance task, typically taking less than 5 minutes. If a unit in your fleet has a leaky core, you do not rotate it out of service; you fix it on the spot.
Repairing the Base Seal (The Critical Decision)
If the leak is at the base, you are dealing with an adhesion failure. For a repair to be durable enough for commercial rental use, it must withstand repeated inflation cycles and the stress of being handled. Here is the recommended procedure:
Clean and Sand: Deflate the unit and thoroughly clean the area around the valve base with isopropyl alcohol. Roughen the surrounding PVC or fabric with fine-grit sandpaper to create a mechanical bond for the adhesive.
Apply Adhesive: Use a high-quality PVC adhesive (e.g., HH-66 or a similar solvent-based glue). Apply a thin, even coat to both the stem and the repair patch (if you are reapplying a patch over the base) and allow it to become tacky.
Clamp and Cure: Press the valve down firmly and clamp it in place. The curing time is the operational cost here. Most adhesives require a 12-24 hour cure period at room temperature before the kayak can be inflated to operating pressure. This is why many commercial shops have a dedicated repair bay where units can sit for a full day.
Pressure Test: After curing, inflate to 75% of the typical working pressure, check for leaks with soapy water, then inflate to full pressure.
In cases where the stem is heavily corroded or the plastic base is cracked, the safe and commercial-savvy decision is to replace the entire valve assembly, which involves cutting out the old stem and gluing in a new one.
Preventive Maintenance and Fleet Management
For a commercial facility manager or rental fleet operator, the goal is to prevent the leak before it causes downtime. Implementing a simple inspection and maintenance schedule can drastically reduce the incidence of valve stem leaks.
Post-Use Rinse: Salt and sand are the enemies of O-rings and cores. A freshwater rinse after every use will prevent abrasive particles from embedding in the seal.
Regular Valve Core Tightening: Valve cores can loosen over time due to vibration and pressure cycling. Use a core tool to check tightness during weekly inventory inspections.
Monitor Pressure Drop: For a pool or a kayak that is kept inflated for long periods, check the pressure regularly. A gradual pressure drop (e.g., 1 PSI over 24 hours) is often indicative of a slow valve core leak that is easily fixed.
Spare Part Stocking: A critical commercial decision is the stocking of spare parts. It is far more cost-effective to have a box of 50 valve cores and O-rings in your supply closet than to have a kayak sitting unusable while you wait for a delivery. The cost of these parts is minimal compared to the lost revenue from a rental unit.
Repair vs. Replace: The Commercial Decision Matrix
You have diagnosed the leak. You know the fix. But is it always worth fixing? For a rental operation, the answer depends on the age of the equipment and the cost of labor.
Leaky Core/O-Ring: Always repair. Parts cost pennies, labor is negligible.
Leaky Base Seal (Single Occurrence): Repair. This is a standard maintenance event for any inflatable in a busy fleet.
Repeated Base Seal Failures on the Same Unit: This is a sign of material degradation (dropping in a UV-damaged area). Consider replacing the kayak or pool. The seam around the valve is load-bearing; if it fails repeatedly, the structural integrity of the unit is compromised.
Leaky Base Seal on an Older Unit with Seam Failures Elsewhere: Retire the unit. The ROI on fixing a single valve on a kayak with multiple leaking seams is negative. The time you spend patching one hole will be wasted when the seam pops next week.
As a product designer, I would recommend that for a commercial fleet, you should only use equipment that has a removable and replaceable valve core and a large, welded base patch. This design specification allows your team to perform rapid field fixes rather than complex shop repairs. For the operator, this means you are spending your time renting, not repairing.
Conclusion: Keeping Your Fleet on the Water
Addressing the issue of a leaky valve stem is a core competency for any commercial inflatable operator. The context of the search term "How to Fix a Leaky Valve Stem on an Inflatable Kayak or Poo" suggests a user in the middle of a problem, likely an operator or a consumer. By adopting a structured diagnostic and repair process—focusing on the O-ring, core, and base seal—you can minimize downtime. More importantly, by integrating simple preventive maintenance into your standard operating procedures, you can prevent the problem from occurring in the first place. Remember, the cheapest fix is the one you don't have to do, and the most profitable kayak or pool is the one that's consistently rented out.