

Why Tent Floor Tears Demand a Different Repair Approach Than Other Inflatable Gear
A torn tent floor is not the same as patching an inflatable boat tube or a bounce house seam. The floor of a commercial tent — especially a large-frame tent, air-beam shelter, or glamping structure — operates under continuous abrasion from ground contact, fluctuating foot traffic, furniture loads, and moisture migration from below. Unlike vertical walls or roof panels, the floor experiences shear forces, point loads from chair legs and bed frames, and cyclic flexing as occupants move. When a tear occurs, stitching is often impractical: sewing weakens the base fabric by creating a line of needle holes, it requires access to both sides of the panel, and in many field conditions, a sewing machine is simply not available.
For rental fleets, resort operators, and emergency shelter managers, the real question is not whether to sew, but how to achieve a repair that restores structural integrity, remains flexible, and resists delamination under load — all without specialist sewing skills. This article focuses on patch repair methods for tent floors, covering adhesive selection, surface preparation, patch geometry, and the performance tradeoffs that commercial buyers should verify before adopting a repair protocol for their fleet.
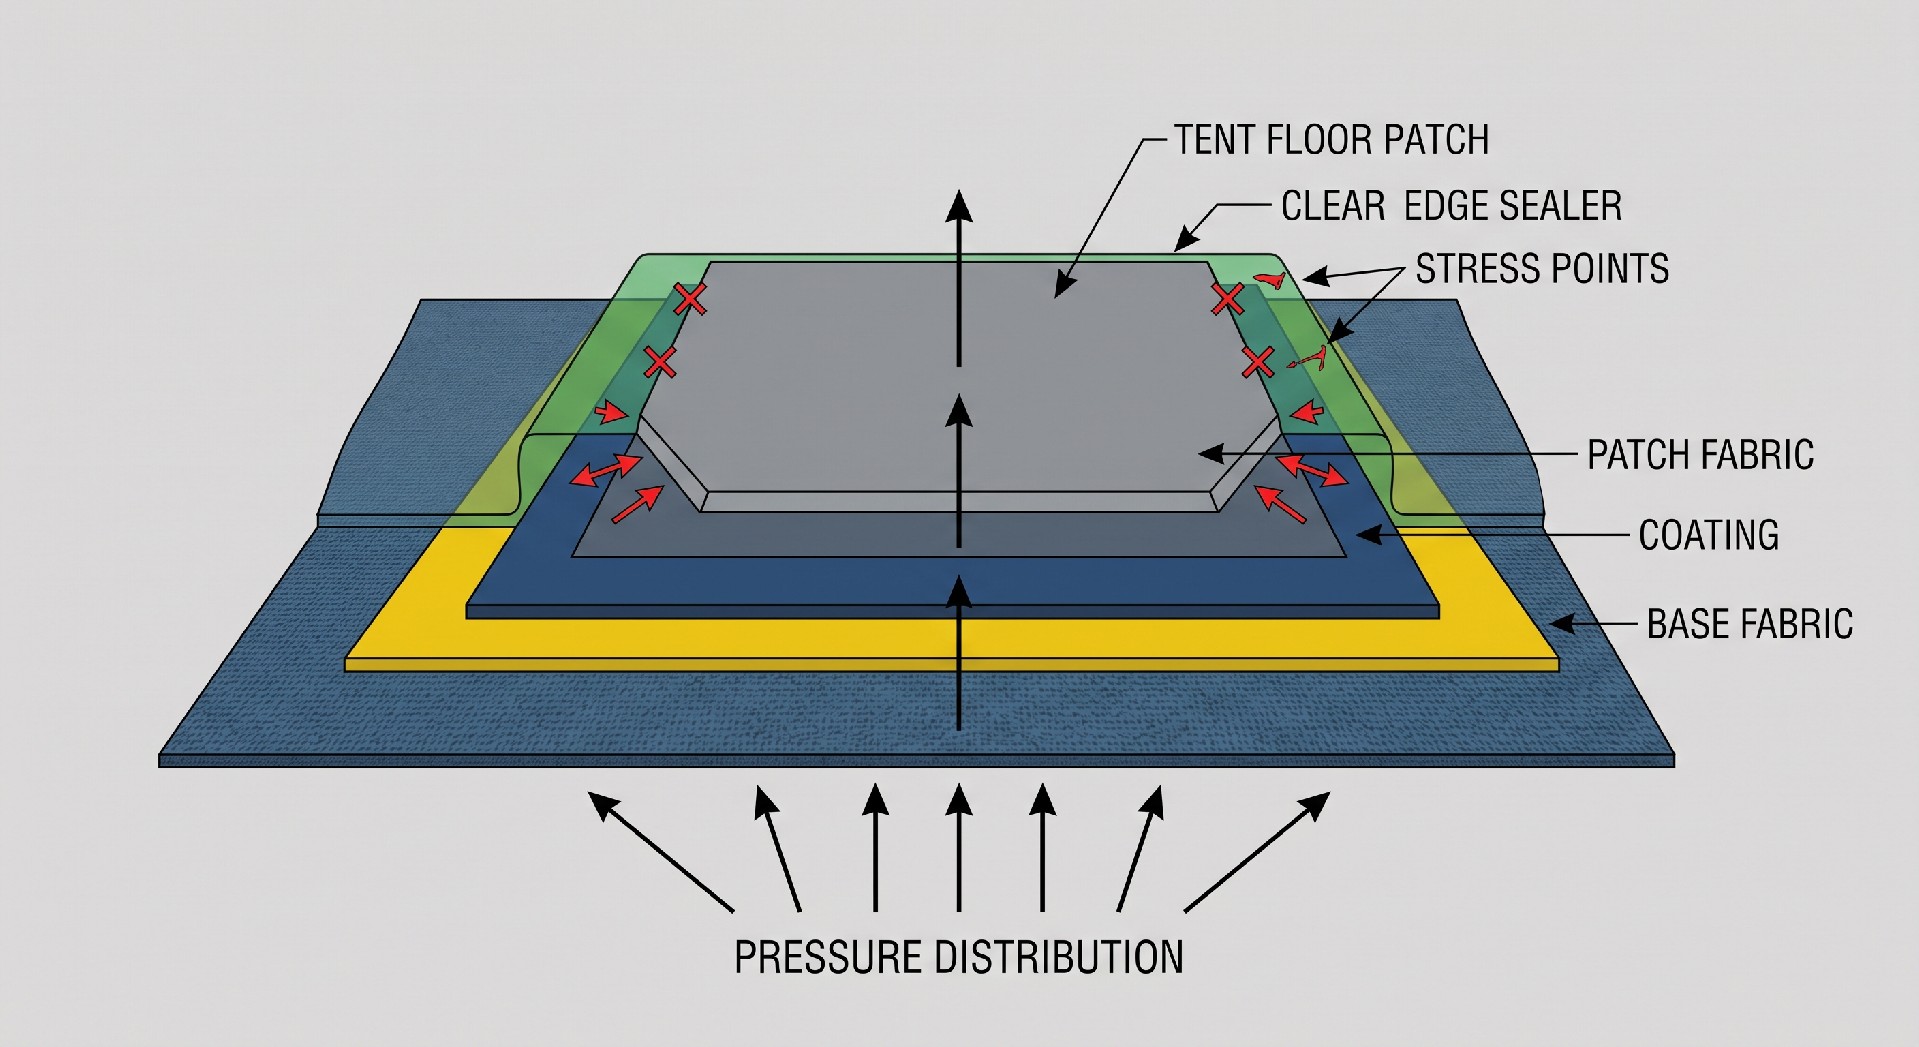
Understanding the Failure Zone: Where Tent Floors Tear and Why
Before choosing a patch method, it is essential to classify the tear type. Most commercial tent floors are constructed from coated fabrics — typically PVC-coated polyester or polyethylene-based laminates. The coating provides waterproofing and abrasion resistance, while the scrim (woven base) provides tensile strength. Tears occur in three primary patterns:
Edge tears — starting at a cut or abrasion point near a seam or perimeter, often caused by dragging equipment over the floor or sharp debris underneath.
Puncture tears — a clean or jagged hole from a dropped stake, rock, or heavy object, often accompanied by localized delamination of the coating.
Crease fatigue tears — small cracks that develop along fold lines after repeated setup and takedown, especially in cold weather when the coating becomes less flexible.
The repair approach varies by tear type. A simple puncture may be sealed with a patch and adhesive, while a large edge tear may require reinforcement with a backing patch to distribute stress. Commercial operators should also assess the floor's coating type — PVC, TPU, or polyurethane — because adhesive compatibility is the single biggest factor in repair durability.
Adhesive Systems for Tent Floor Patching: What Works in the Field
For a no-sew repair, the adhesive is the critical load-bearing interface. Inflatable boat repair adhesives are often too rigid for tent floors, which need to remain pliable to fold and unfold. Conversely, general-purpose contact cement may not bond to the specific coating or may become brittle over time. The most reliable field-proven adhesive classes for tent floors include:
Solvent-based PVC adhesives — these soften the coating surface and create a chemical bond. They are effective for PVC-coated floors but require proper ventilation and curing time. Typical commercial formulations include HH-66 or equivalent vinyl cements.
Two-part polyurethane adhesives — these offer excellent flexibility and bond strength to a wider range of coatings, including TPU and some polyurethane blends. They are more expensive and have a shorter working time, making them better suited for workshop repairs than emergency field fixes.
Acrylic-based repair tapes — these are the fastest option for temporary or light-duty repairs. They require no curing time and are clean to apply, but their long-term bond strength under shear and cyclic loading is generally lower than liquid adhesives. Tape is best suited for sealing small punctures or as a protective overlay over a liquid-adhesive patch.
For rental fleet operators, a hybrid approach is common: use a liquid adhesive for the primary bond, then apply a tape overlay to seal the patch edges and reduce the risk of peeling during folding.
| Repair Method | Best For | Cure Time Before Loading | Field Durability (Typical Cycles) |
|---|---|---|---|
| Liquid adhesive + fabric patch | Tears 1-6 inches, PVC-coated floors | 24 hours at 15-25°C | 50-100 setup/takedown cycles |
| Acrylic repair tape only | Punctures under 1 inch, temporary fixes | Immediate | 10-20 cycles, then re-apply |
| Two-part polyurethane adhesive | TPU-coated floors, high-flex areas | 48 hours at 20°C | 100-150 cycles under light load |
| Hybrid (liquid adhesive + tape overlay) | Edge tears, high-peel risk areas | 24 hours for adhesive, tape immediate | 80-120 cycles |
Step-by-Step Patch Procedure for Commercial Tent Floors
The following procedure is based on field-proven methods used by large event rental companies. It assumes the operator has access to the floor on a flat, clean surface and can allow adequate cure time before folding or loading.
Step 1 — Clean and Degrease
Use a solvent such as isopropyl alcohol or a dedicated fabric cleaner to remove dirt, oils, and moisture from the area surrounding the tear. Extend cleaning to at least 3-4 inches beyond the tear edge. Allow the surface to dry completely. In humid or cold conditions, this may require additional time or a heat gun on low setting.
Step 2 — Prepare the Patch Material
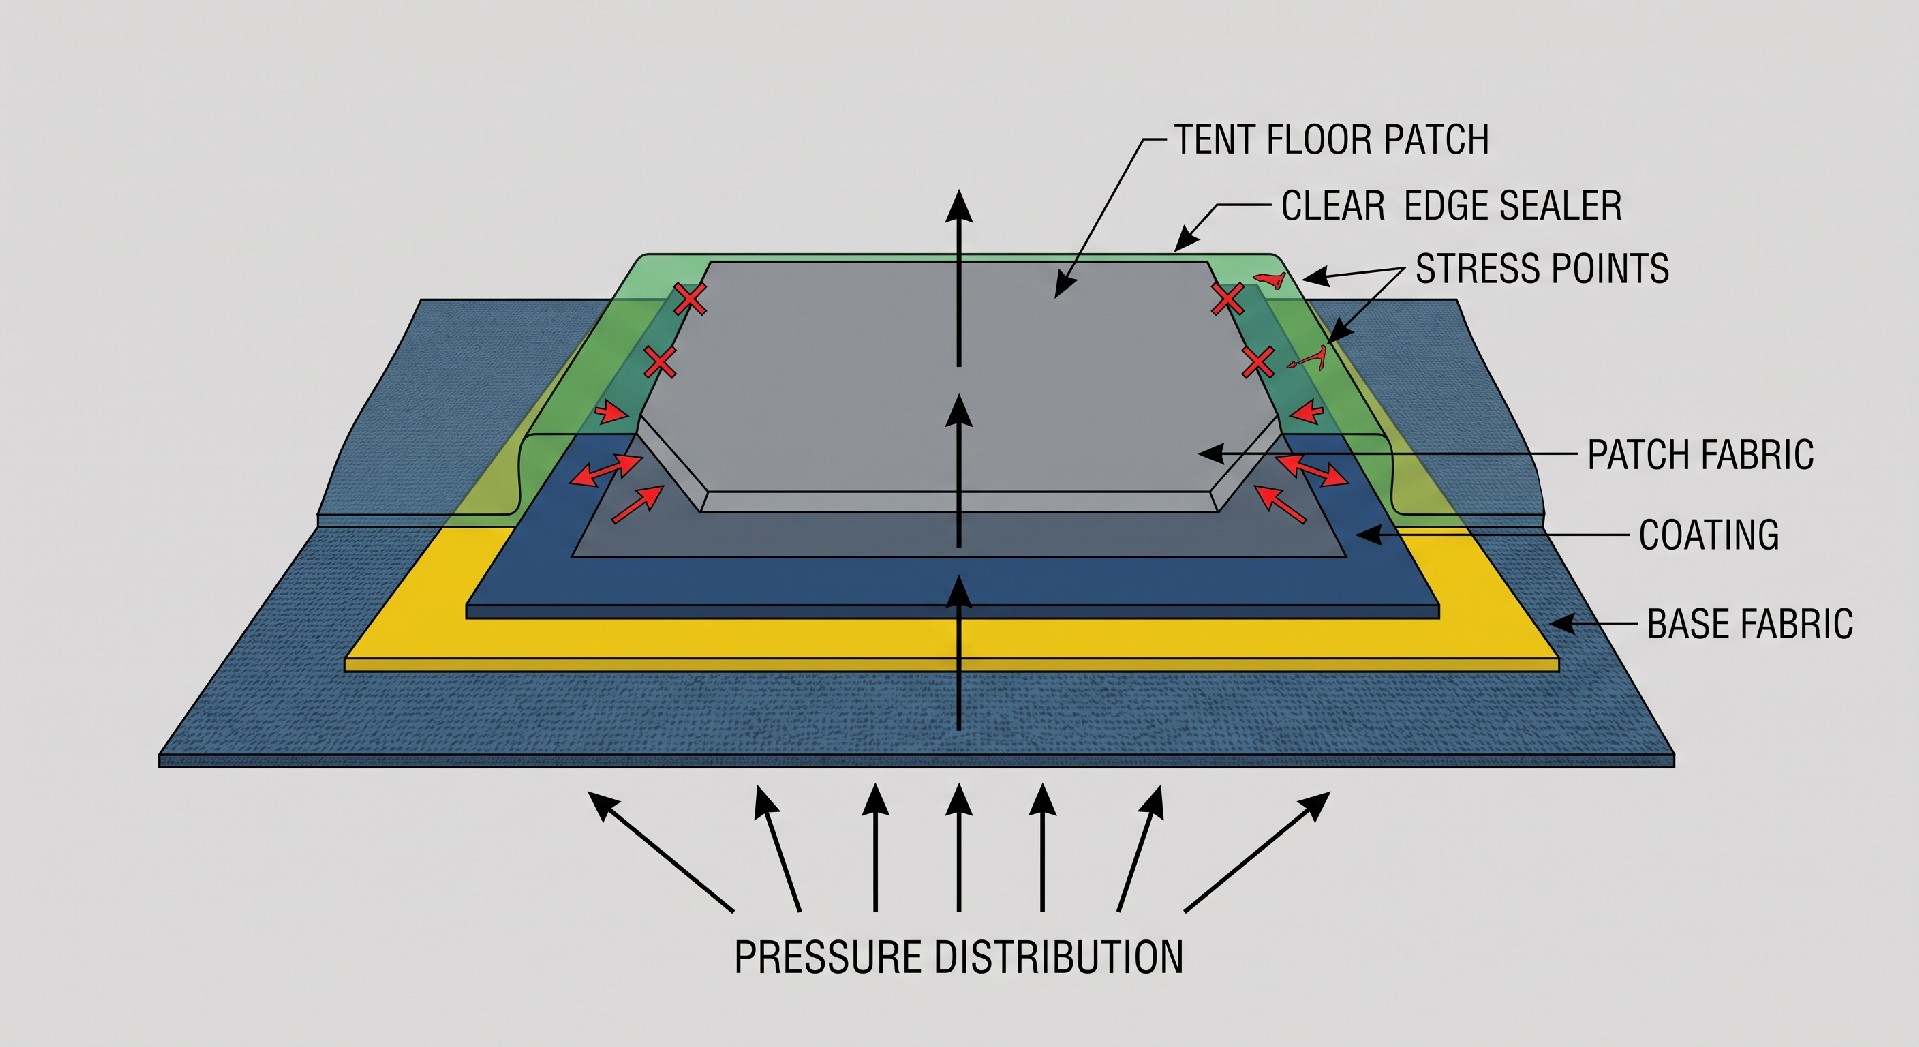
Cut a patch from the same or compatible coated fabric. For PVC floors, use a PVC-coated patch material of similar thickness and weave. The patch should be round or oval — sharp corners create stress concentration points that initiate peeling. For a tear longer than 4 inches, use a patch that extends at least 2 inches beyond the tear on all sides. For a large edge tear, consider using a two-layer patch: a backing patch applied to the underside (if accessible) and a top patch.
Step 3 — Apply Adhesive to Both Surfaces
For solvent-based adhesives, apply a thin, even coat to both the patch and the floor surface. Allow the first coat to become tacky (typically 5-15 minutes depending on temperature and humidity), then apply a second coat. For two-part polyurethane adhesives, follow the manufacturer's working time and application instructions precisely — these adhesives cure by chemical reaction and cannot be re-activated once set.
Step 4 — Position and Bond
Carefully place the patch over the tear, aligning it to minimize air bubbles. Use a small roller or the back of a spoon to apply firm, even pressure from the center outward, forcing out trapped air and ensuring full contact. For large patches, a weighted bag or sandbag can maintain pressure during the initial cure.
Step 5 — Cure and Seal Edges
Allow the adhesive to cure according to the manufacturer's recommendations. For solvent adhesives, 24 hours at room temperature is typical before subjecting the floor to full load. In cold environments, curing time may double. After cure, apply a bead of seam sealer or an acrylic tape around the patch perimeter to prevent edge lifting.
Performance Expectations and Commercial Tradeoffs
No patch repair restores a tent floor to 100% of its original tensile strength. For a properly executed patch using a compatible adhesive and patch material, the bond strength typically reaches 70-85% of the base fabric's tear strength, depending on the adhesive system and surface preparation. This is usually sufficient for floors under standard foot traffic and furniture loads, but not for areas subject to heavy point loads or repeated folding along the same line.
Commercial operators should establish a repair classification system:
Class A (cosmetic) — small punctures under 1 inch, patched with tape or liquid adhesive, acceptable for general use but monitored for edge lifting.
Class B (structural) — tears 1-6 inches, patched with liquid adhesive and reinforced patch, acceptable for normal rental use but restricted from high-load zones (e.g., under beds or heavy staging).
Class C (return to manufacturer) — tears over 6 inches, tears along seam lines, or multiple tears in the same floor panel — these should be evaluated for factory seam repair or panel replacement.
For rental fleets, the decision to repair versus replace should include the cost of downtime, the likelihood of repeat failure in the same area, and the impact on client satisfaction if the repair fails during an event.
Supplier Considerations for Floor Materials and Repair Kits
When procuring commercial tents, buyers should request information from the manufacturer or supplier about the floor coating type, recommended adhesive compatibility, and repair kit availability. Some manufacturers offer OEM repair kits that include pre-cut patch material and a matched adhesive — these are always preferable to generic alternatives because the adhesive is formulated for that specific coating. For fleet operators, stocking a standardized repair kit across all tents simplifies training and ensures consistent repair quality.
For OEM buyers and private-label sellers, specifying the floor material and coating system in the product design phase directly affects repair feasibility. PVC-coated floors are the easiest to repair with widely available adhesives, while TPU-coated floors offer better cold-weather flexibility but require more specialized adhesives. This tradeoff should be evaluated against the intended operating climate and the anticipated repair frequency.
Repair Protocol Checklist for Commercial Fleet Managers
Before adopting a no-sew tent floor repair protocol, verify the following against your operational plan:
Confirm the floor coating type and select an adhesive system tested by the supplier for that material.
Develop a standard patch kit with pre-cut patches, adhesive, cleaning solvent, roller, and nitrile gloves.
Train setup crews on surface preparation and adhesive application — poor cleaning is the number one cause of patch failure.
Establish a curing area with adequate ventilation and temperature control (above 15°C for most solvent adhesives).
Implement a post-repair inspection checklist that includes edge adhesion checks and a load test (e.g., walking with a weighted cart) before returning the tent to service.
Document each repair with photos and notes on location, tear size, and adhesive batch — this data helps identify recurring failure patterns.
For operators with high tent utilization rates, consider scheduling major repairs during off-season periods to allow extended cure times. The cost of a rushed repair that fails during a rental far exceeds the cost of replacing a floor panel or retiring a worn tent.
Final Decision: Repair, Patch, or Retire
The decision to patch a tent floor without sewing is not a one-size-fits-all answer. For small, isolated tears in a PVC-coated floor, a liquid adhesive patch with a tape overlay is a reliable, cost-effective solution that restores functionality for multiple rental cycles. For large tears, tears along high-stress zones, or repeated failures in the same tent, the long-term economic choice is often to replace the floor panel or retire the tent, rather than accumulate patches that create uneven surfaces and weak points.
Commercial buyers should view patching not as a permanent fix, but as a field maintenance technique that extends the service life of a tent floor by 1-3 additional seasons, depending on usage intensity. The key to success lies in adhesive compatibility, thorough surface preparation, and adequate curing time — factors that are fully controllable within a well-managed fleet operation.
When specifying a new tent floor for your fleet or event inventory, include repair methodology in your supplier evaluation. Ask the manufacturer: "What adhesive do you recommend for field repairs?" and "Do you supply pre-cut patch kits?" The answers will reveal how much thought the supplier has given to lifecycle maintenance — a strong indicator of overall product quality.